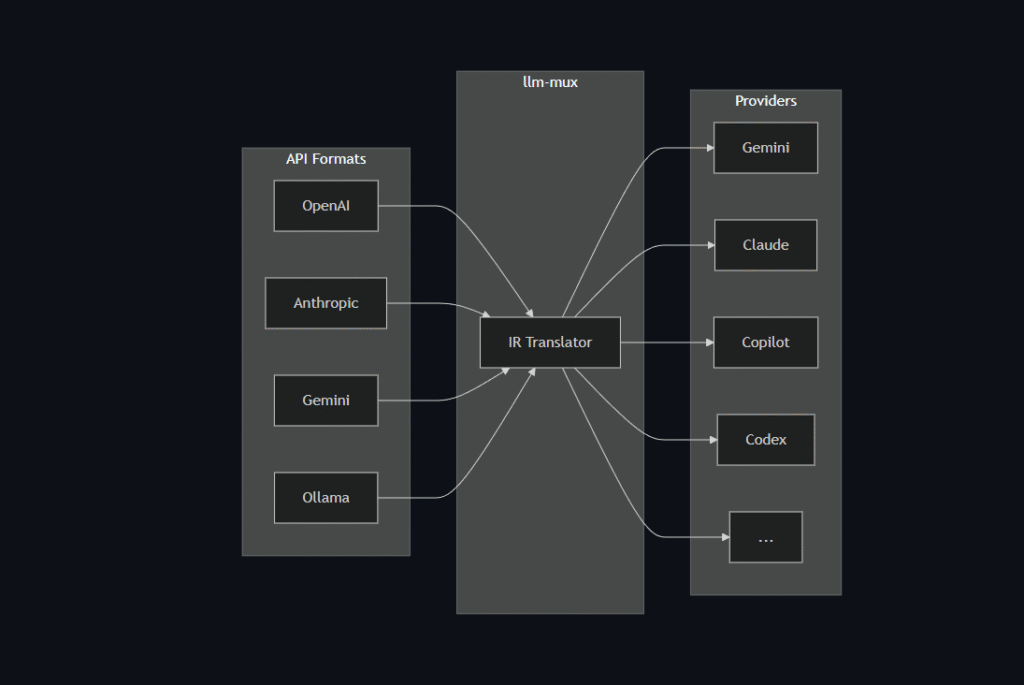
Do you want an AI assistant right inside Visual Studio Code (VSC) to explain code, debug, or write unit tests, but also want the freedom to choose between GPT-4, Claude, or a Local LLM? This article will guide you on how to combine LLM Mux with VS Code to create the most powerful programming environment.
Prerequisites
- Visual Studio Code installed.
- Python (to run LLM Mux).
- LLM Mux Source code:
https://github.com/nghyane/llm-mux
Step 1: Install and Run LLM Mux
First, we need to set up the internal “AI server”.
- Clone the project to your machine:Bash
git clone https://github.com/nghyane/llm-mux cd llm-mux - Install the necessary libraries (usually via
requirements.txt):Bashpip install -r requirements.txt - Configure your API Keys in the
.envorconfigfile of the project (enter your OpenAI/Anthropic keys here). - Start the Server:Bash
python main.py # Assuming server runs at: http://localhost:8000
Step 2: Install the “CodeGPT” Extension in VS Code
By default, VS Code doesn’t support connecting directly to a Custom URL, so we need an intermediary Extension. CodeGPT is a great choice.
- Open VS Code -> Select the Extensions tab (the square icon on the left).
- Search for:
CodeGPT. - Click Install.
Step 3: Configure VS Code Connection to LLM Mux
This is the most crucial step to “trick” the Extension into pointing to your LLM Mux.
- Press
Ctrl + Shift + P(orCmd + Shift + Pon Mac). - Type and select: CodeGPT: Set API KEY.
- Enter any random character (e.g.,
sk-123456). Since LLM Mux manages the real keys, you can enter anything here, as long as it’s not empty.
- Enter any random character (e.g.,
- Go to CodeGPT Settings (File -> Preferences -> Settings -> Type
CodeGPT). - Find Provider: Select
OpenAI(orOpenAI Compatible). - Find Base URL:
- Change the default URL to your Local URL.
- Example:
http://localhost:8000/v1(Note: add/v1if the project requires it).
Step 4: Experience It
Now everything is ready!
- Open any code file.
- Highlight a code snippet, right-click, and select CodeGPT: Explain this Code.
- Or open the chat window on the left to command: “Write a Python function to connect to SQL”.
At this point, the request will go from VS Code -> LLM Mux -> Actual AI Model, helping you code faster, more securely, and with greater flexibility.